Bracelet collage

Bracelet collage
Wrist Bling

Saturday, July 21, 2012

The Watcher


                The Watcher


The last of his kind on Middle Earth.
 His eyes have born witness to the battles of Men.
 His Armour handed down through the Ages..


This piece has been over one year in the design and making. First I had to convince the fantastic Polymer clay artist Lynn Reno of Desert Rubble   that her Polymer Clay Dragon Eyes were the utmost closest to perfection to be found. I knew I had to have one. She even made the eye (ball) the color of my choosing.


After the eye arrived I looked at it for months..Secretly opening the box,  unwrapping the tissue paper and gazing at this phenomenal work.  I have a boot at the Sarasota Medieval Faire and knew this Dragon had to be back in his own realm.


The finished product you see here is the culmination of 7 different design attempts until I was satisfied. The Watcher has European 6 in 1 Aluminum chain maille for the base, surrounded of all 4 sides by Helm chain. The Dragon's armour is Japanese 12 in 2 in Mint anodized Aluminum.
The Watcher also comes with a chain also handmade. I chose aluminum for the lightweight appeal.


Large Magatamas create the look of scales surrounding the Dragon Eye piece.

Friday, July 6, 2012

Pin To Win !!

So here is my first PIN TO WIN  giveaway !

I'm new at this so if I do something wrong please bear with me.
The giveaway is a pair of my "Ritz" Earrings!  They are made using Silver Filled Wire and gorgeous Swarovski Crystal Top Drill bi cones.

To enter - merely Pin the photo to one of your boards. Winner will be chosen randomly through Random.org on Sunday night .

Happy Pinning !


Saturday, June 9, 2012

Possible new tutorial on the way

As many of you know I work in a Bead Store part time as well as teach there. We have a very sweet lady who is allergic to all metals, but loves her jewelry. She has a great eye for color and design too!

So she was playing with different ways to bead around a magnetic clasp so she can wear it safely.
She came in and showed us what she came up with and it was so simple and fast!

Would you like me to photo it and post it here for you to try?

When I mentioned her making a tut for others, her reply was " Post it on your blog for others to enjoy. It may help someone else with metal allergies"

So be on the look out for
Karen Cooper's  10 minute beaded magnetic clasp covers  soon !

Friday, November 25, 2011

And the Holiday shopping begins!

Beginning yesterday (Thanksgiving 2011) every item in my ArtFire Store is on sale.

No coupons needed! no jumping through hoops merely choose, click and you are finished!

I've also taken the pledge to "Shop Small Businesses on Saturday" too. You too can get involved.

Have an American Express card? Register it on the Small Business site and you can get a $25 credit on your purchases!

Tuesday, September 27, 2011

Making Elegant Ear wires that are interchangeable

For years I've made ear wires to go on my earring designs. I use a simple elegant design that is interchangeable with different dangles. Instead of offering a "set" with one pair or ear wires and multiple choices of changeable dangles I thought you might like to make your own ear wires.

These are not the best photos, I make jewelry and make no claims to being a one handed photographer :)


Here is a photo showing the different dangles I wear on my interchangeable ear wires.


 Tools list.
2 pieces 3 inch round wire. You can use 20g to 24g. Just remember if you use 24g they must very light weight dangles. The ear wires on the far right side top are made with 24g round. They are dainty looking-but with heavy dangles can tear the ears. (Think of piano wire and an assassin)


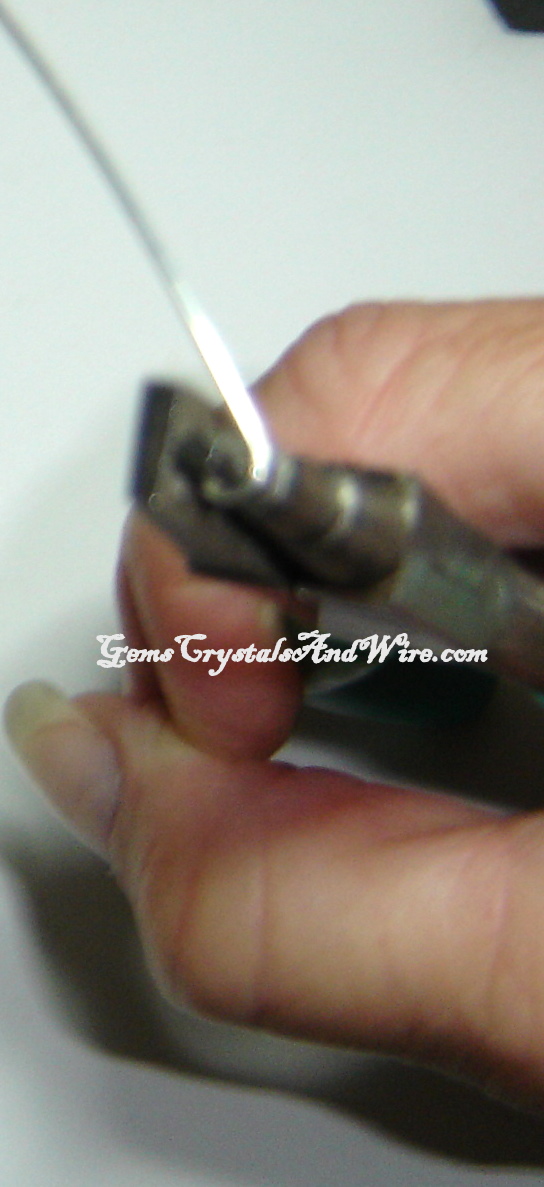
My favorite too. A 3-step plier. Notice the back side is flat -not concave. I labeled the steps, as this is the way you'll make your earrings. *Remember the flat side will always be the -back-**


Place one end of your wire so it just shows above the first step on the pliers. This will make it easier for the other side to meet up with it.


Bring your wire around Step1 until it meets the tip to form a circle.

This is how your wire should look after you remove it from the pliers.


Next place your wire on -step2- of the pliers. Notice how my loop now touches the flat/back of the pliers?  Keep your loops on the back side and you won't turn your wire the wrong way.


Once again, bring your wire around to meet itself and form another loop.

 Step 2 of your earrings. This larger loop will be the bottom of the ear wire where your dangle will go.


Step 3. Place the loops next to the back of the pliers as above. I recommend placing both ear wires on at the same time so your earrings are identical in length. Wrap the wires around the third step in the pliers.

Your earring is almost complete.

Here you can change it up a bit .I "tipped" the end to give it a more professional look.


Variation:
I used the smallest tip of my round nose pliers in place of step 1, then step 1 on my pliers in place of step2 and finally step 3 for the ear lobe bend in the wires. This also gave me extra wire, which I sometimes clip off or leave long depending on the dangles I put on them.
You can also use a variety of items to make the ear lobe loop. An extra large Sharpie works great too.

As an added bling to your ears you can put a small crystal charm on the smalles loop.

Your next step is to use either a de-burring tool or sand paper to smooth the rough edges before placing them in your ears.

Saturday, September 3, 2011

Labor Day Thank You Sale!

I'm having a Labor Day Weekend sale in my ArtFire shop with 20% off all bracelets!

If you've always wanted that custom Girlfriends-Mothers-Sisters-Generation Bracelet now is the best time to get one for yourself or for a special person in your life.

Regularly priced at $21.00 it will now hold  a sale price of  $16.80!

This sale applies to ALL bracelets in my store including Sterling Silver and Gold Fill.

Remember to use coupon code WRISTBLING  upon check out to get your sale price!

Hurry this sale will end on Tuesday September 6,2011.

Wednesday, April 27, 2011

Wow!!!! 2500 FaceBook fans!!!!


I can hardly believe it myself...


Quite a few give aways ago I asked "Do You Trust Me?" So many of you did that I was astounded.
Well, it applies here as well.. Only I know what the prize will be, but I can promise it will be a good one!
All I will say is this:
The winner will receive an item made of Sterling Silver & Gold Fill.

*******Please read all rules below********

  1. To be entered sign up is on my Facebook Fan page. You must post in the comments section where you see the logo header above.  You may post comments on my blog-but they won't count as an entry.
  2. You must put in your wrist size (not the size bracelet you wear), ring size,-AND- length of necklace preferred. Total of 3 measurements.
  3. There must be a way to contact you should you win. If your FB page is tightly secured and I can't send a message I will regrettably be forced to redraw a new winner.
  4. Comment posts without the above information will be deleted-to help keep a proper count.
  5. You have enough time to find that elusive tape measure, because the winner will not be drawn until Saturday!
Have fun and SURPRISE!!!!!!